Migrating away from DevMate: redirecting Sparkle updates

September 2019

DevMate is the service I use to gather download and install statistics for most of my apps. It also serves the update feeds for all non-Mac App Store apps. Earlier this year DevMate announced its retiring the platform in December.

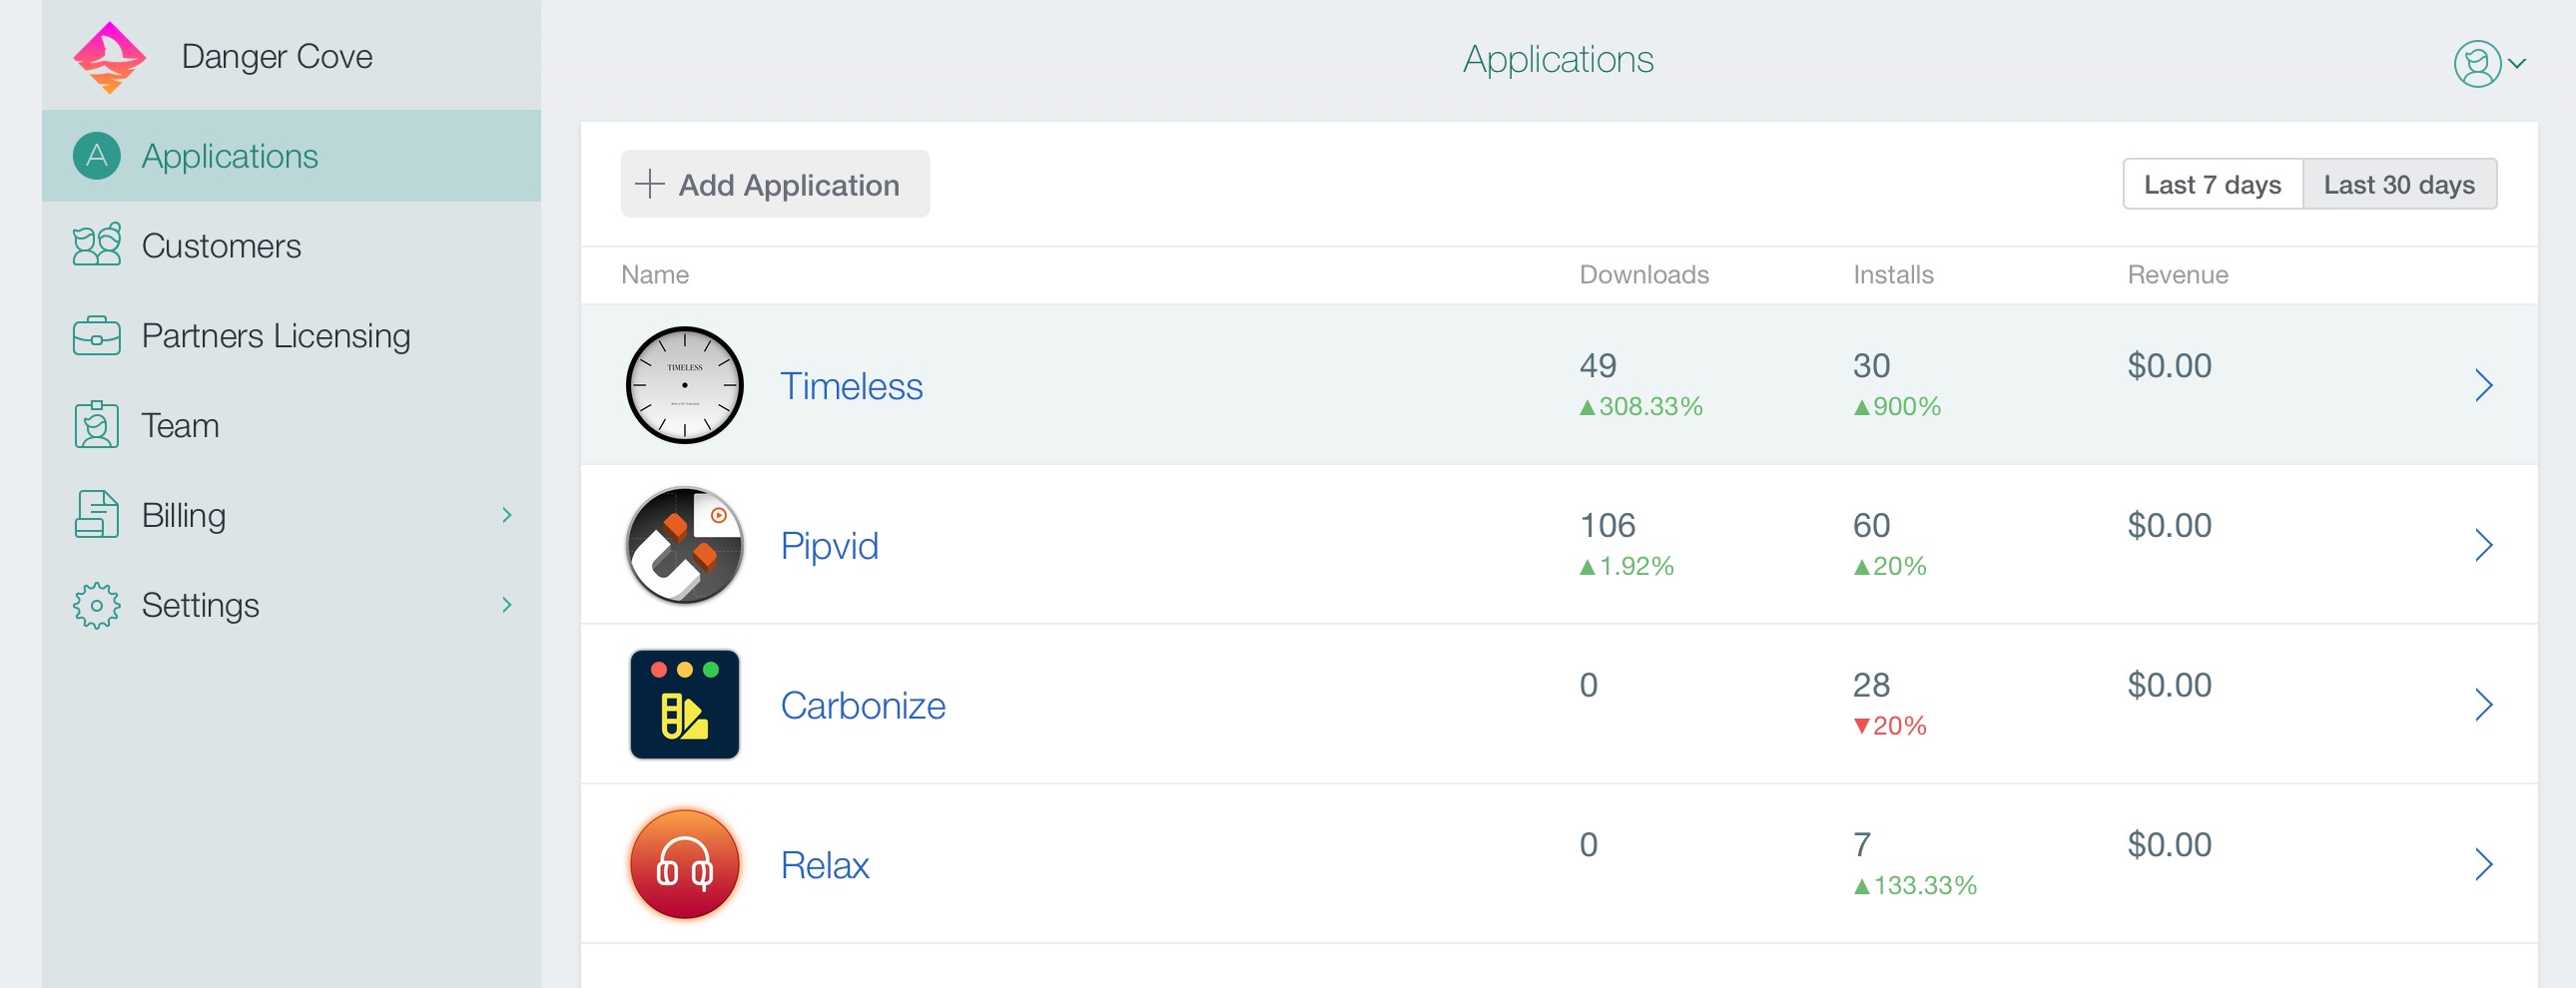
A screenshot of my DevMate dashboard, showing about 50 downloads and 30 installs for Timeless in the past 30 days and 100 downloads and 60 installs for Pipvid

In this post I’ll outline how I’m preparing my apps to migrate to a new update feed. Christian Tietze mentions asking DevMate to point the Sparkle update feed to a new location. He also recommends to not rely on DevMate’s redirect to work forever. That’s where my approach comes in.

I urge you to take control over the feed URL entirely and redirect it yourself. DevMateKit uses Sparkle under the hood. This means a custom update URL can be specified by implementing a Sparkle delegate method.

Setting the URL

class ApplicationCoordinator: NSObject, Coordinator {

  ...
  
  private func configureUpdates() {
    DM_SUUpdater.shared().delegate = self
  }
}

extension ApplicationCoordinator: DM_SUUpdaterDelegate_DevMateInteraction {
    func feedURLString(for updater: DM_SUUpdater) -> String? {
        if Defaults.shared.isEnabled(setting: .betaUpdates) {
            return .appcastBetaURLString
        } else {
            return .appcastURLString
        }
    }
}

extension String {
    static let appcastURLString = "https://updates.dangr.co/\(Bundle.main.bundleIdentifier!)/appcast.xml"
    static let appcastBetaURLString = "https://updates.dangr.co/\(Bundle.main.bundleIdentifier!)/beta-appcast.xml"
}

After this change Timeless will check for updates at updates.dangr.co. I can set redirects for this domain however I want.

Redirecting

I use Netlify to handle the redirects. Here’s what that looks like:

com.dangercove.Timeless.Mac/appcast.xml*      https://updates.devmate.com/com.dangercove.Timeless.Mac.xml:splat       301
com.dangercove.Timeless.Mac/beta-appcast.xml* https://updates.devmate.com/beta/com.dangercove.Timeless.Mac.xml:splat  301

As you can see I currently redirect to the feed at DevMate, but I can redirect it anywhere else whenever I want. This allows me to use DevMate for as long as possible and switch to any other service that uses Sparkle. I’m keeping a close eye on App Center by Microsoft. They put Sparkle feeds for macOS on the roadmap for September.

I posted Timeless on /r/productivity

September 2019

I posted Timeless to the Productivity sub-reddit the other day to gather feedback. The entire post is included below. If you’d like to provide feedback on my tool to reduce time anxiety I encourage you to chime in, use the built-in feedback dialog in the beta or contact me on Twitter.

The comments are very encouraging!


Hi there, I’ve been working on Timeless, an app to reduce the Time Anxiety I’ve been experiencing. For me, it manifests like this:

  • 10.00 “Only 10 am?? It feels like I’ve been doing nothing.”
  • 11.30 “Better not start something new, it’ll be lunch soon.”
  • 14.00 “Sheesh this day is never going to end…”
  • 16.00 “It’s already 4 pm?? I did nothing today and it’s too late to start now.”

Six months ago I disabled the clock in the top right corner of my screen on my Mac. That worked wonders, but made it hard to stay grounded and remember mundane stuff like getting up to grab lunch. 😅

That’s when I created the small menu bar application that I’d like your feedback on. It’s currently available for free as a beta on usetimeless.app.

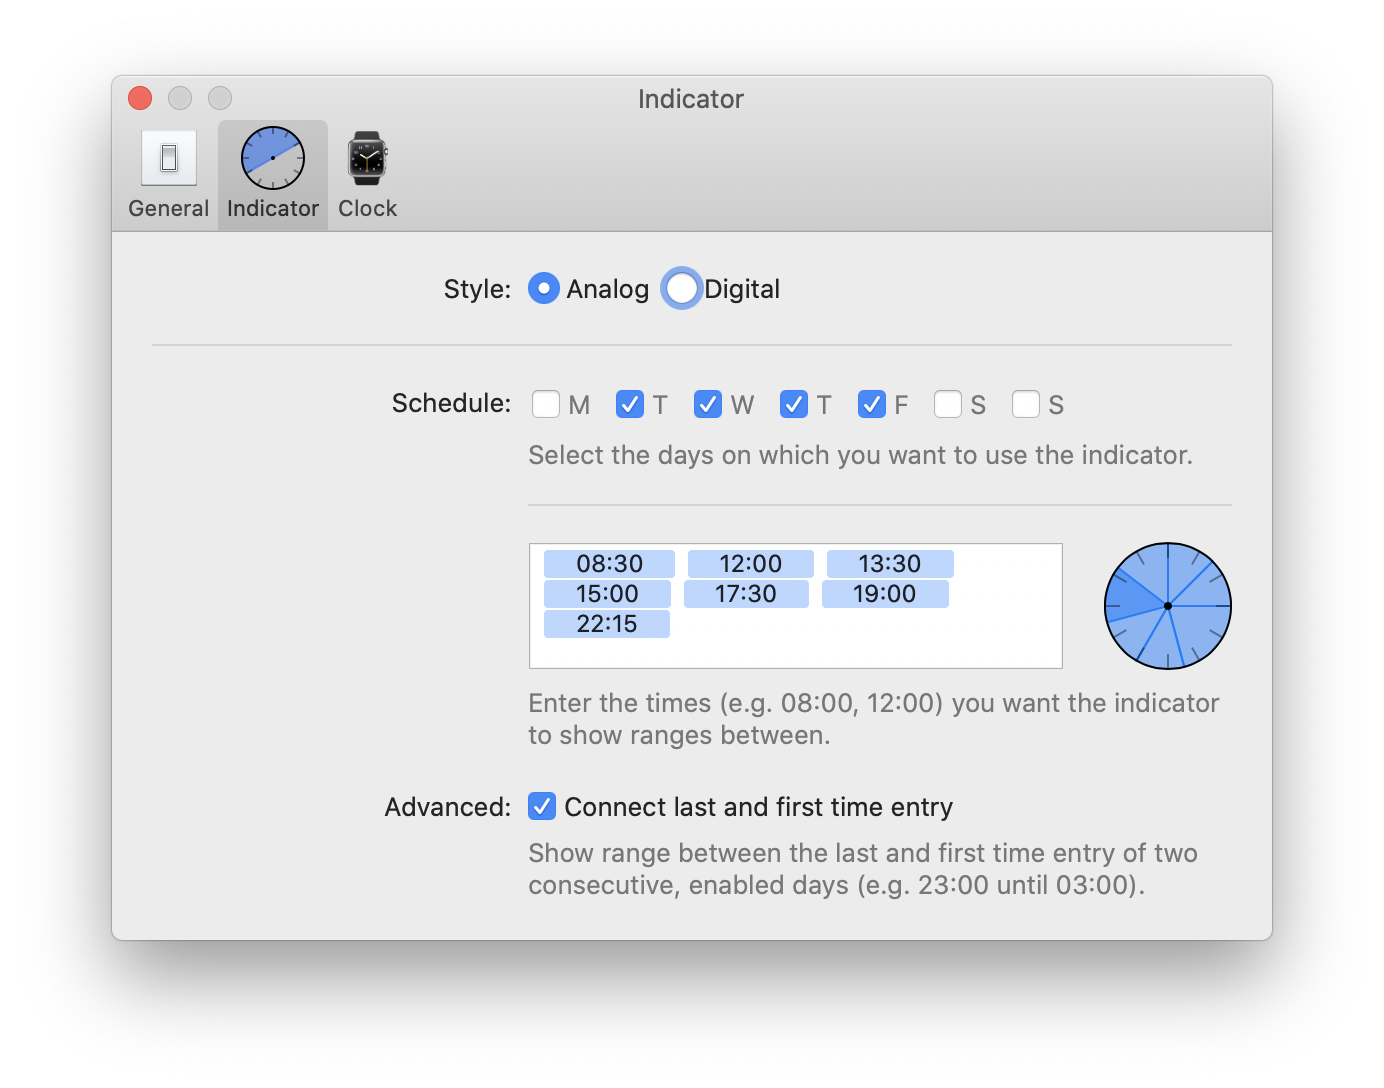
It works by setting time ranges that are then indicated in the corner of your screen instead of an actual clock. This means that when it’s 9.45am you might see a range that shows that it’s between 8am and 12pm. For me this reduces the mental burden some hours of the day give me, while still allowing me to naturally get through the day without feeling like a robot and setting tons of reminders. (I still set reminders for important events.)

I think it’s great, but I’d love for more people to try this approach and let me know what they think. I’m curious to find out if this is something that can be applied universally, and if there are features missing. In the last update for example, I added the option to only show the indicator on certain (work) days and just show the time when the indicator is idle.

Let me know what you think!

(The app is currently only available for macOS. I’ll start on a Windows version when I’ve gathered enough feedback. If you’re on Windows and still would like to help, disabling your clock and letting me know how it affects your day is very useful information to me!)

A screenshot of Timeless' indicator in the menu bar A screenshot of Timeless' indicator preferences

Fix "mapped file has no Team ID..." in Xcode 11

September 2019

After applying the preferred project settings in Xcode 11 you might be confronted with the following error while loading a Library at runtime:

dyld: Library not loaded: @rpath/DCOAboutWindow.framework/Versions/A/DCOAboutWindow
  Referenced from: /Users/username/Library/Developer/Xcode/DerivedData/Pipvid-adwfbkaurzovizgaarwkmugeihce/Build/Products/Debug/Pipvid.app/Contents/MacOS/Pipvid
  Reason: no suitable image found.  Did find:
	/Users/username/Library/Developer/Xcode/DerivedData/Pipvid-adwfbkaurzovizgaarwkmugeihce/Build/Products/Debug/Pipvid.app/Contents/MacOS/../Frameworks/DCOAboutWindow.framework/Versions/A/DCOAboutWindow: code signature in (/Users/username/Library/Developer/Xcode/DerivedData/Pipvid-adwfbkaurzovizgaarwkmugeihce/Build/Products/Debug/Pipvid.app/Contents/MacOS/../Frameworks/DCOAboutWindow.framework/Versions/A/DCOAboutWindow) not valid for use in process using Library Validation: mapped file has no Team ID and is not a platform binary (signed with custom identity or adhoc?)

The issue is caused by a new entry in your project.pbxproj that specifies the signing identity: CODE_SIGN_IDENTITY = "-";. It’s set to Sign to Run Locally by default.

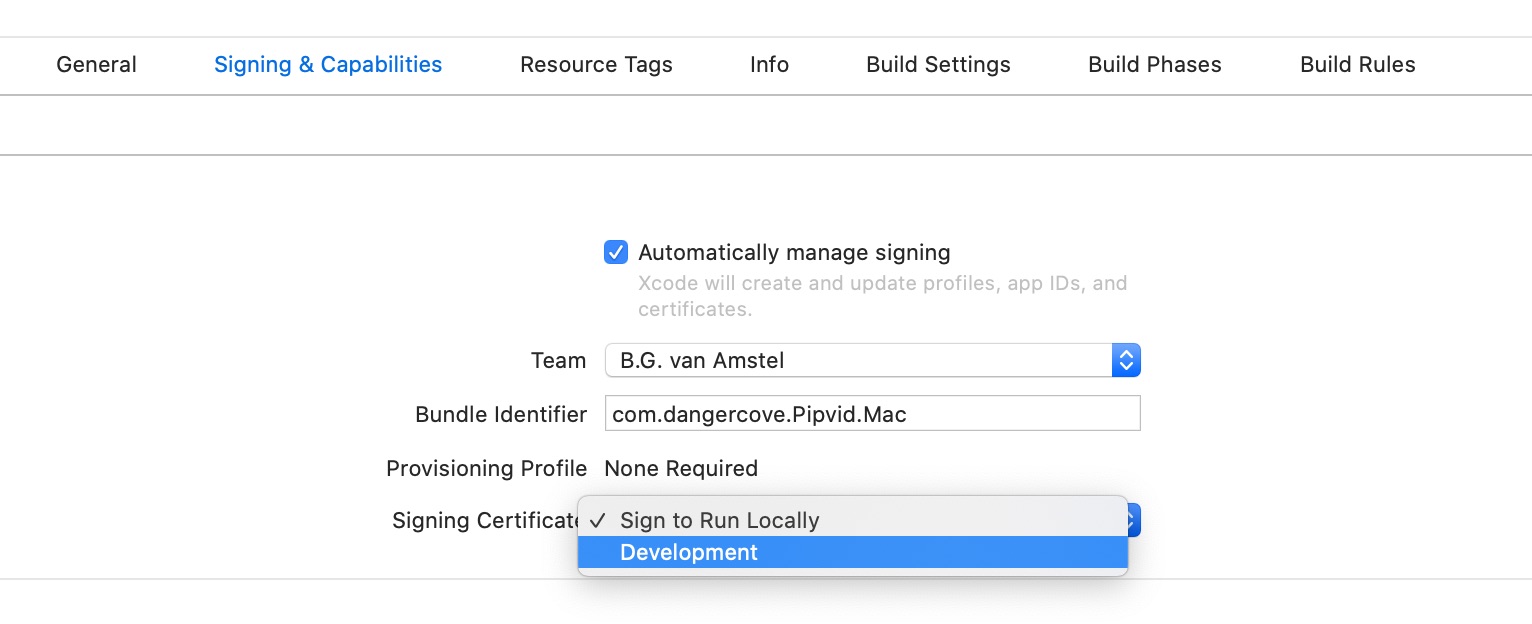
Changing Signing Certificate to Development under Signing Capabilities in the project settings resolves the issue. You could also manually update the entry to CODE_SIGN_IDENTITY = "Apple Development";.

A screenshot showing that you should set 'Signing Certificate' to 'Development'

Originally appeared on posts.boy.sh

Implementing the homepage and news redesigns

September 2019

As promised, in this second part of the website redesign story I’ll go over the technical details of the changes I made to the website.

Stack & frameworks

To get a sense of how the website’s built, here’s an overview of what I use to layout and serve its content.

It’s a simple setup. The entire site is statically generated by Jekyll and then served by Netlify. Bulma is a CSS framework that allows me to style templates quickly.

Homepage

Let’s take a look at the homepage first. The list of apps is generated by including the app/overview.html template and assigning it a set of apps pages.

{% assign live = site.pages | where: 'layout', 'app/live' %}
{% assign announced = site.pages | where: 'layout', 'app/announced' %}
{% assign apps = announced | concat: live %}
{% include app/overview.html apps=apps %}

I fetch the apps to display by querying site.pages for pages that use the app/live and app/announced layout. Then I concatenate both arrays into a single apps variable and pass that to the includable app/overview.html template.
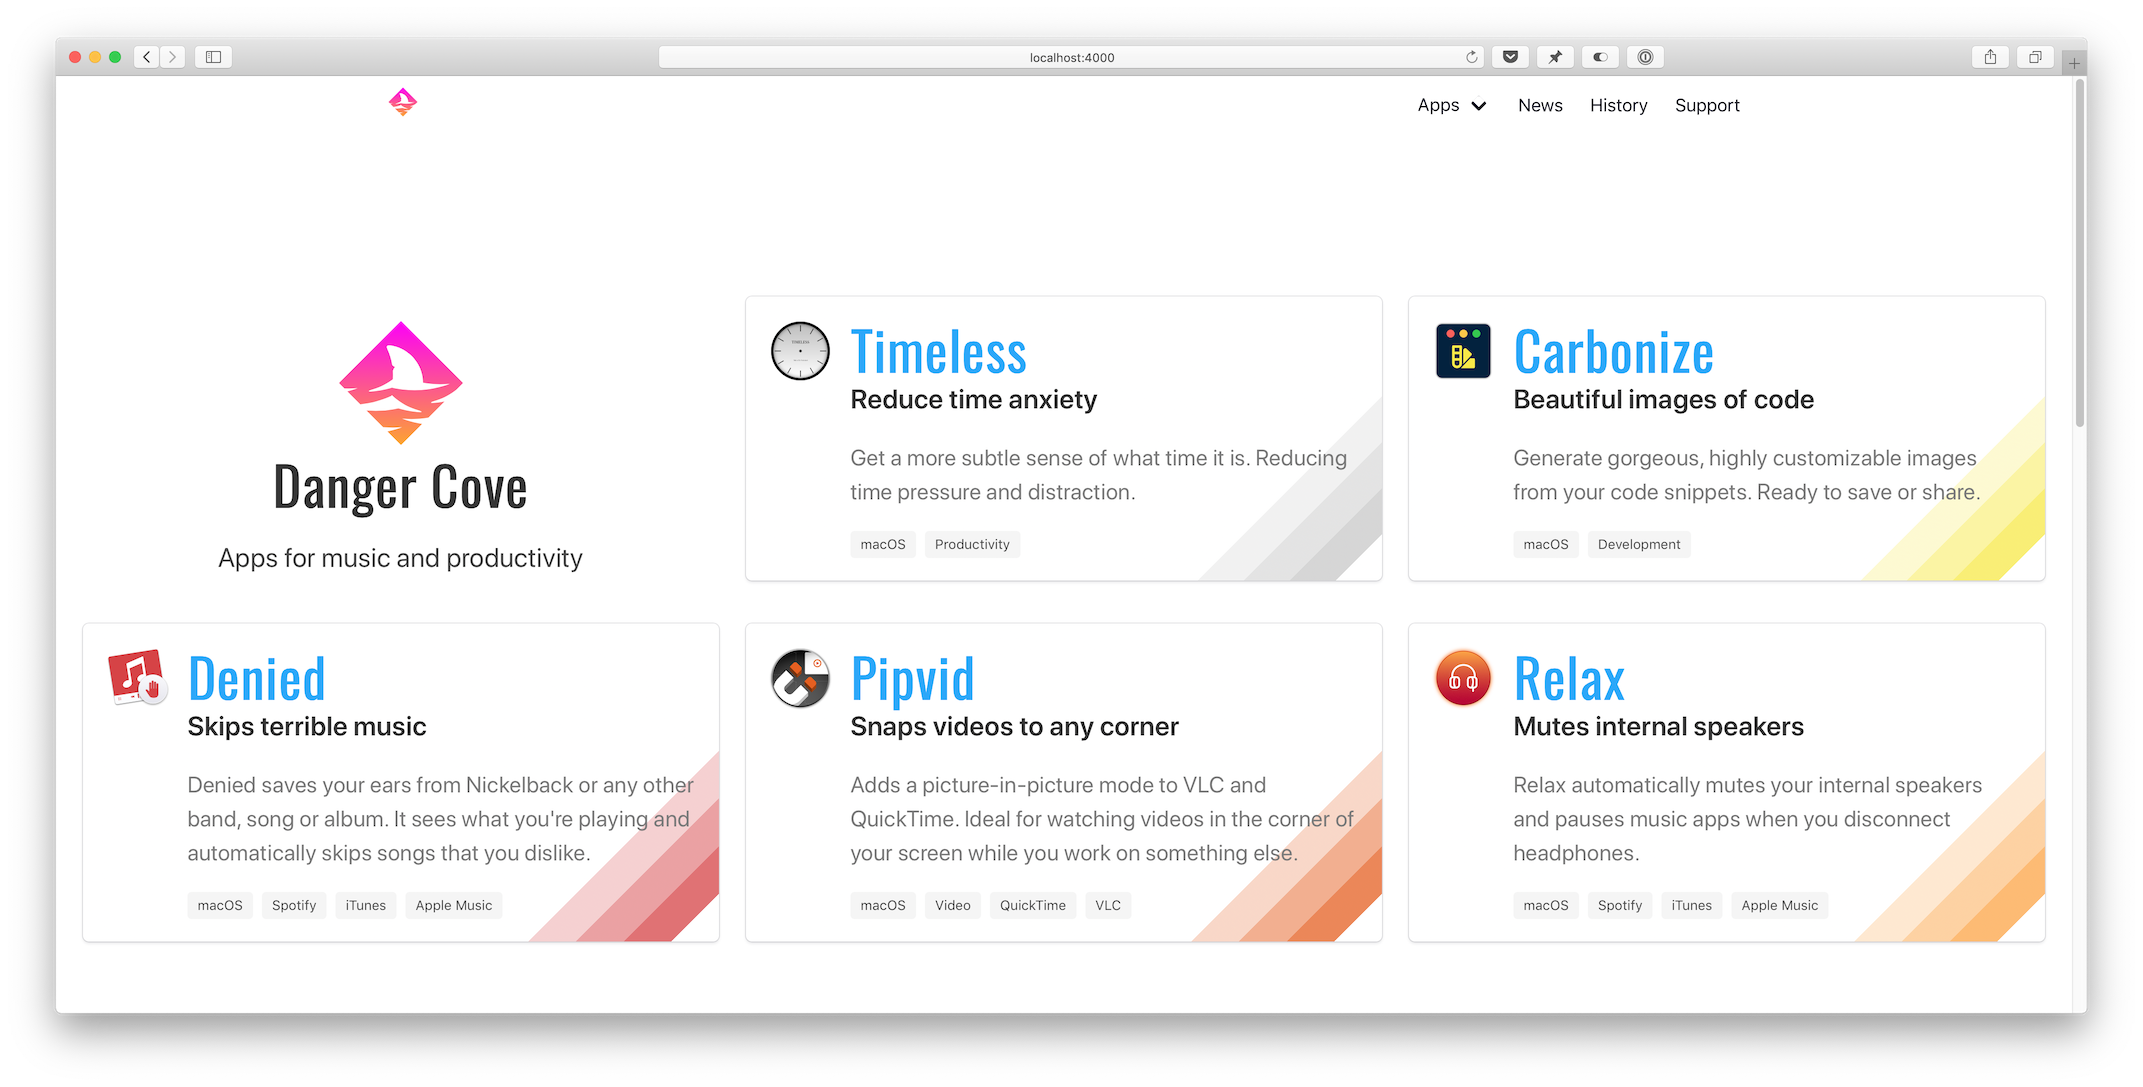
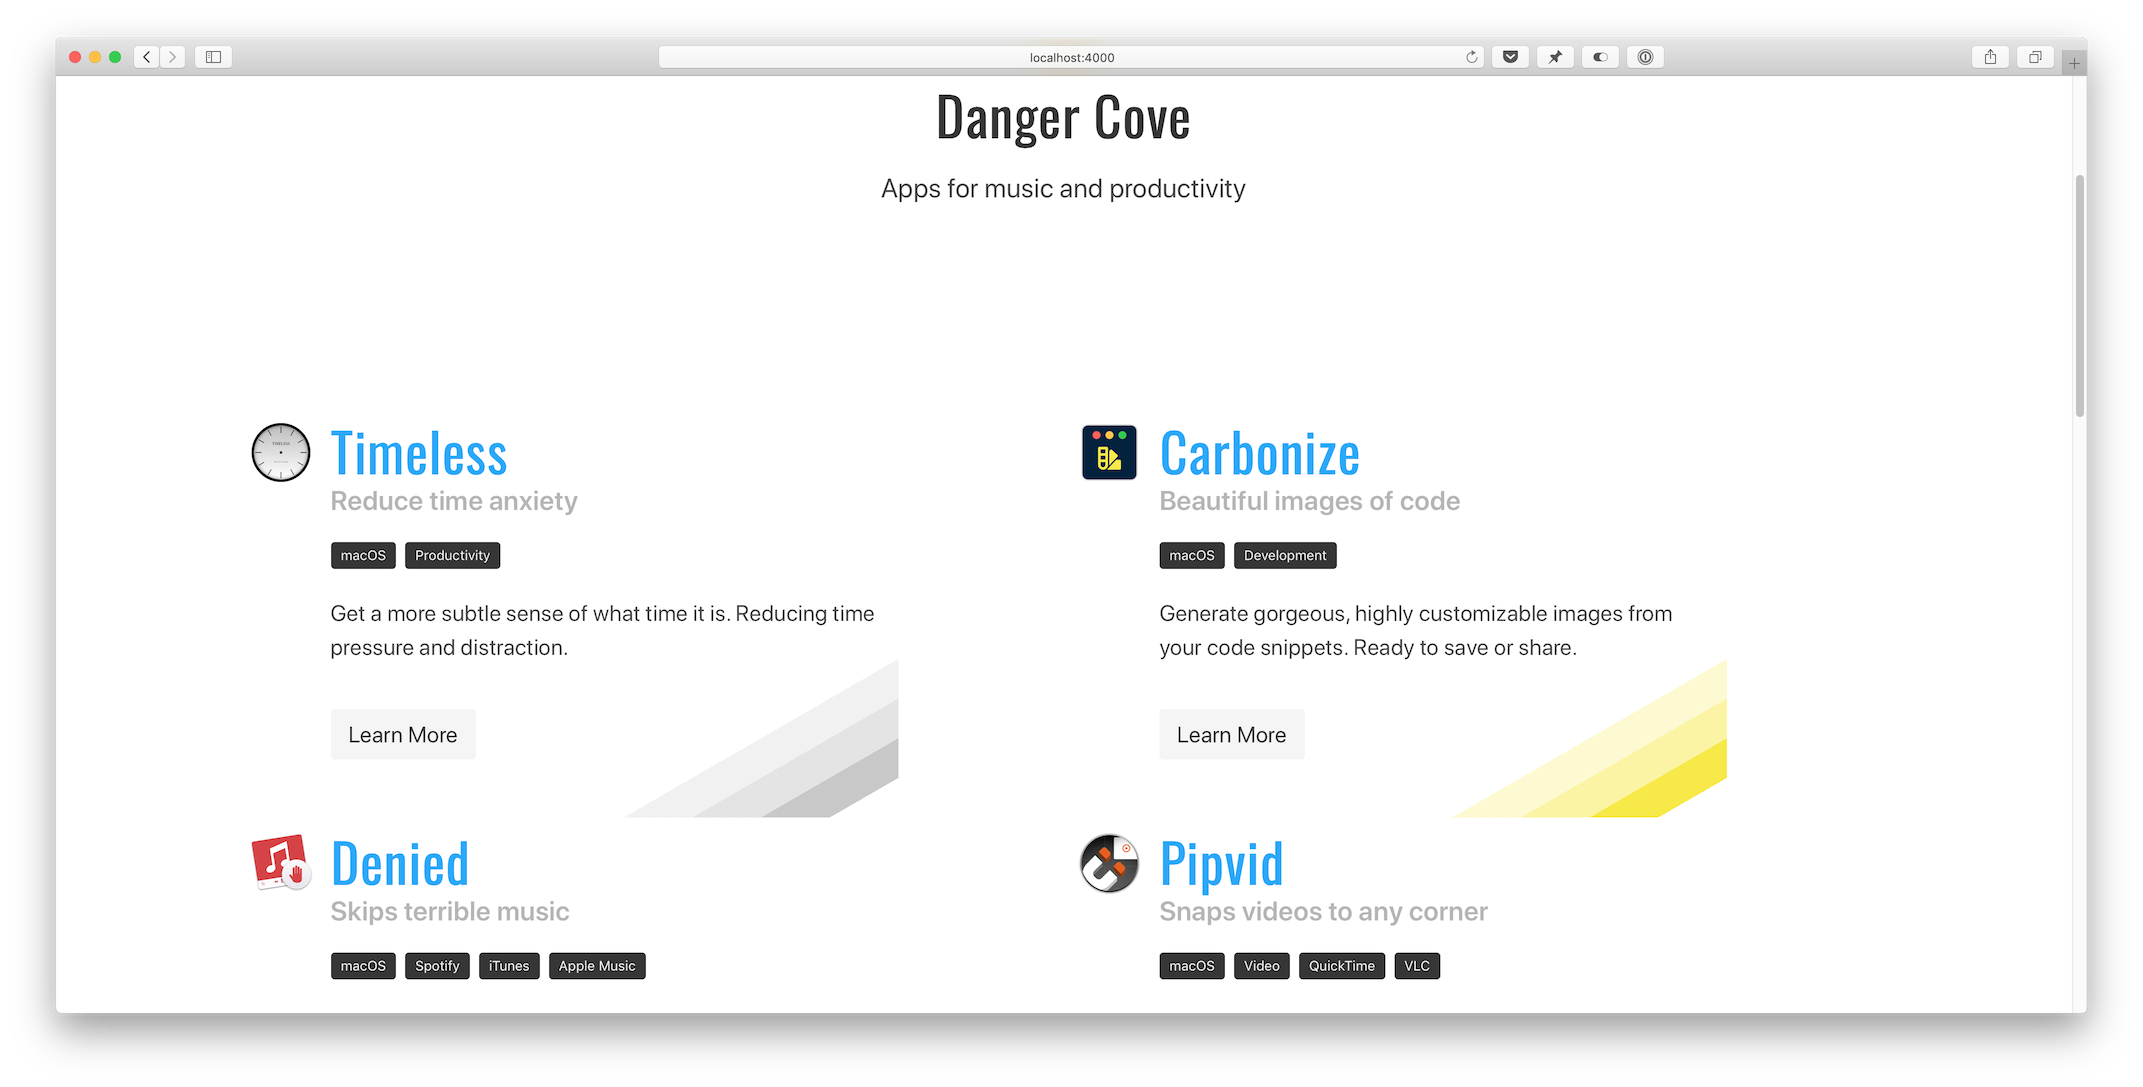
A screenshot of the homepage after the changes. It shows a compact row of boxes that represent all the apps.

Overview template

The app/overview.html template checks if it’s on the homepage (if page.layout == "home") and adds the Danger Cove logo accordingly.

...
{% if page.layout == "home" %}
<div class="column is-4-widescreen is-half-desktop is-full-tablet is-full-mobile">
  <div class="box is-shadowless has-text-centered">
    {% include logo/retro.html %}
    <h1 class="title is-size-2-mobile is-1 is-spaced">{{ page.title }}</h1>
    <h2 class="subtitle is-size-5-mobile is-4">{{ page.subtitle }}</h2>
  </div>
</div>
{% endif %}
...

Then it loops over the provided apps and includes app/introduction.html for each. This is the actual visual representation of the app, in the form of a card. Pulling it out into a separate include makes it trivial to display the app card anywhere else. I’ll use it again when showing related apps with blog posts. More on that a little further down.

...
{% for app in apps %}
<div class="column is-4-widescreen is-half-desktop is-full-tablet is-full-mobile">
  {% include app/introduction.html app=app %}
</div>
{% endfor %}
...

Notice the convenient column CSS classes that Bulma provides. It’s trivial to scale the layout from mobile to widescreen devices.

Front matter

The app/introduction.html template pulls the title, subtitle, description and colors from the app’s front matter. This is what the front matter for Timeless looks like:

---
layout: app/announced
site_title: Don't get distracted by time
title: Timeless
subtitle: Reduce time anxiety
description: >-
  Get a more subtle sense of what time it is. Reducing time pressure and distraction.
date: 2018-07-18
icon: timeless-clock_512.png
hero: 
  icon: timeless-clock_512.png
  dominant_color: 
    r: 200
    g: 200
    b: 200
features:
  - Specify several, customizable 'time segments'.
  - Indicates the current segment in the menu bar.
  - Display the actual time and date with a single click.
tags:
  - macOS
  - Productivity
topic: timeless
mailchimp: 
  interests: [2]
permalink: /timeless/
---

Every card shows a specific rainbow of colors in its bottom right corner. Storing this information in the page’s front matter allows me to pull it out in the template and apply per-app design details.

{% assign color = app.hero.dominant_color %}
<div class="box" style="background-image: linear-gradient(135deg,
transparent 80%,
rgba({{ color.r }}, {{ color.g }}, {{ color.b }}, 0.25) 80%,
rgba({{ color.r }}, {{ color.g }}, {{ color.b }}, 0.25) 85%,
rgba({{ color.r }}, {{ color.g }}, {{ color.b }}, 0.5) 85%,
rgba({{ color.r }}, {{ color.g }}, {{ color.b }}, 0.5) 90%,
rgba({{ color.r }}, {{ color.g }}, {{ color.b }}, 0.75) 90%,
rgba({{ color.r }}, {{ color.g }}, {{ color.b }}, 0.75) 95%,
transparent 95%)
;">
...

It’s hard to get around using style="" for this loop. On the app’s landing pages I apply the colors to a generic CSS class that I can use in the template.

...
{% if page.hero.dominant_color %}
{% assign color = page.hero.dominant_color %}
<style>
  .hero-app {
    background: linear-gradient(35deg,
    transparent 60%,
    rgba({{ color.r }}, {{ color.g }}, {{ color.b }}, 0.25) 60%,
    rgba({{ color.r }}, {{ color.g }}, {{ color.b }}, 0.25) 70%,
    rgba({{ color.r }}, {{ color.g }}, {{ color.b }}, 0.5) 70%,
    rgba({{ color.r }}, {{ color.g }}, {{ color.b }}, 0.5) 80%,
    rgba({{ color.r }}, {{ color.g }}, {{ color.b }}, 1) 80%,
    rgba({{ color.r }}, {{ color.g }}, {{ color.b }}, 1) 90%,
    transparent 90%);
  }
...

Setting class="hero-app" atomatically applies the rainbow background for each app.

News overview

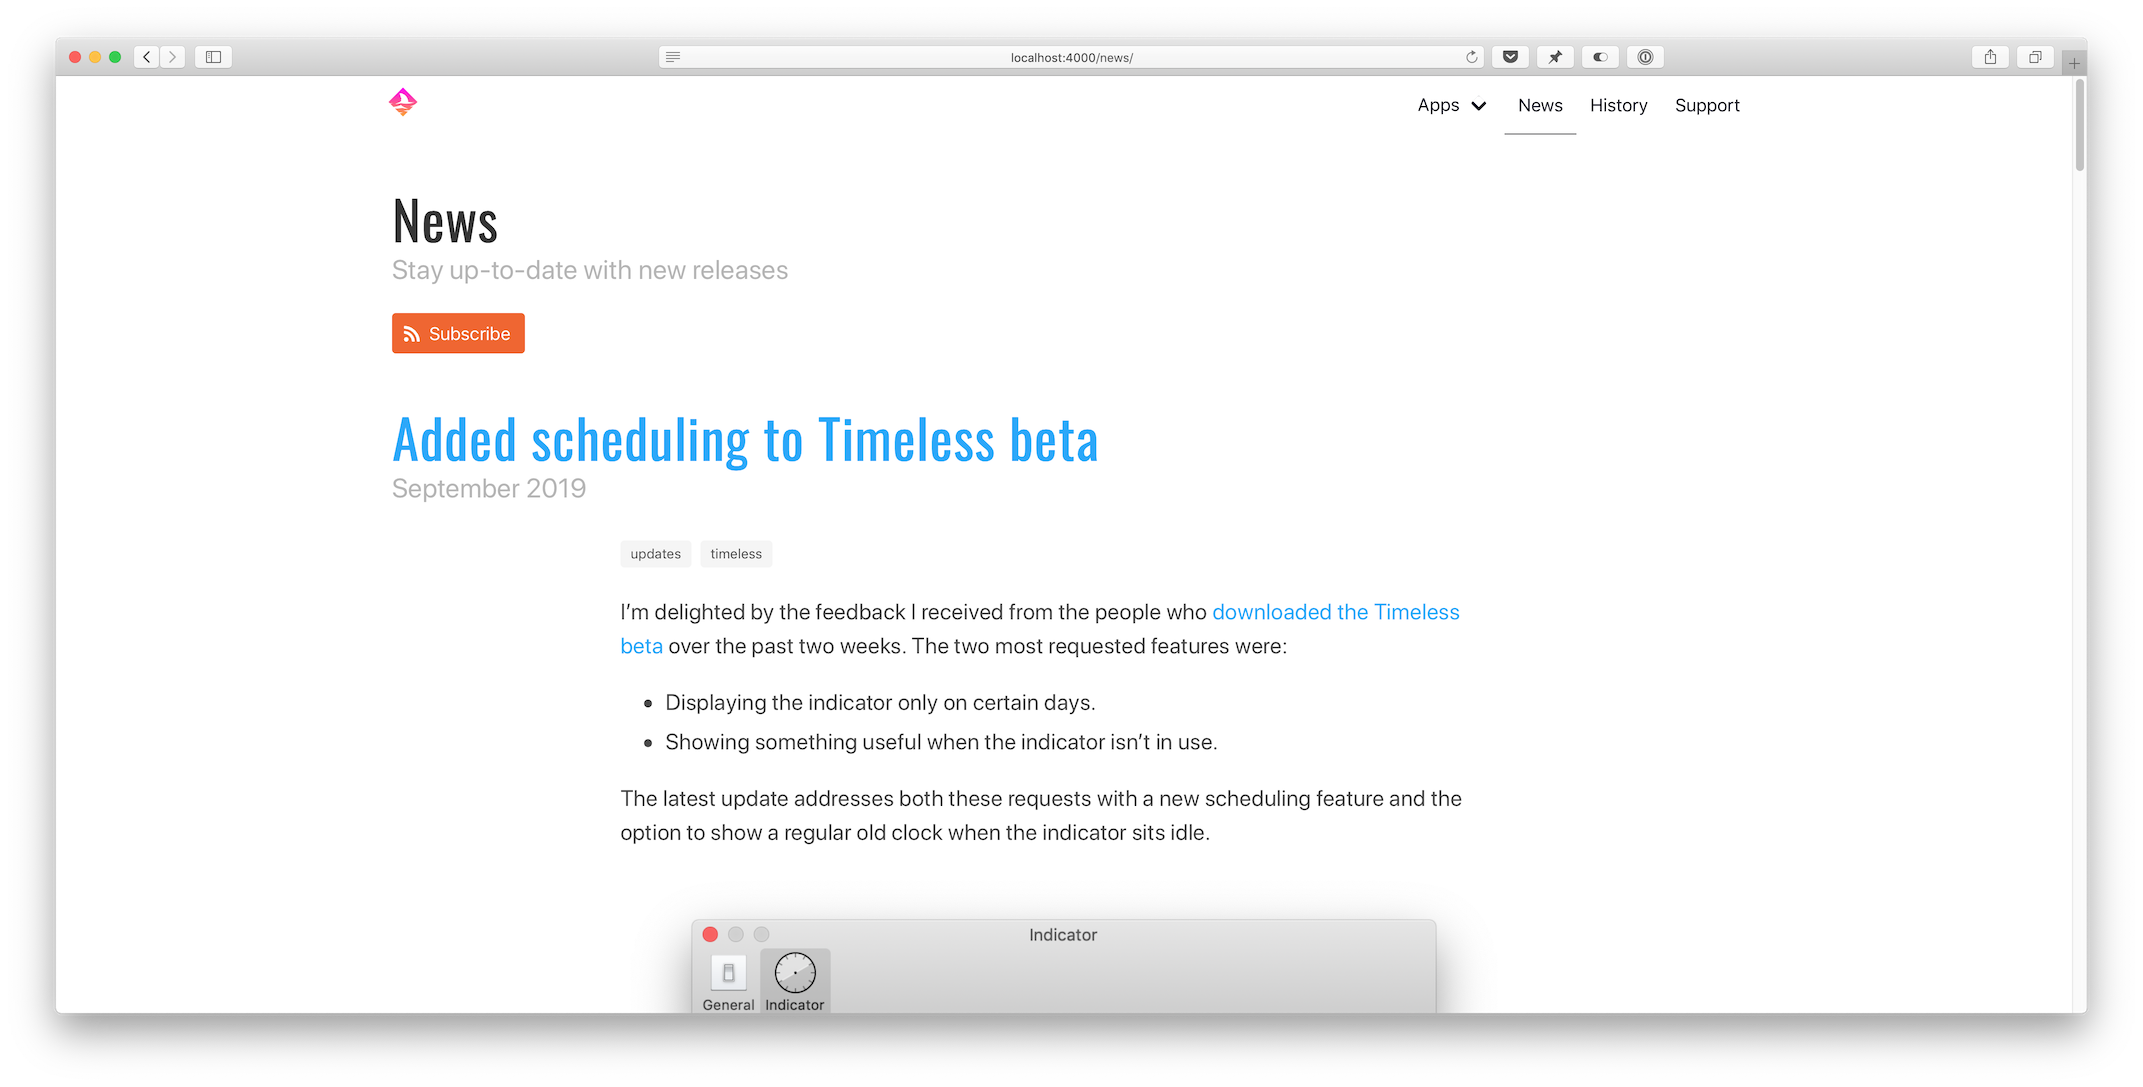
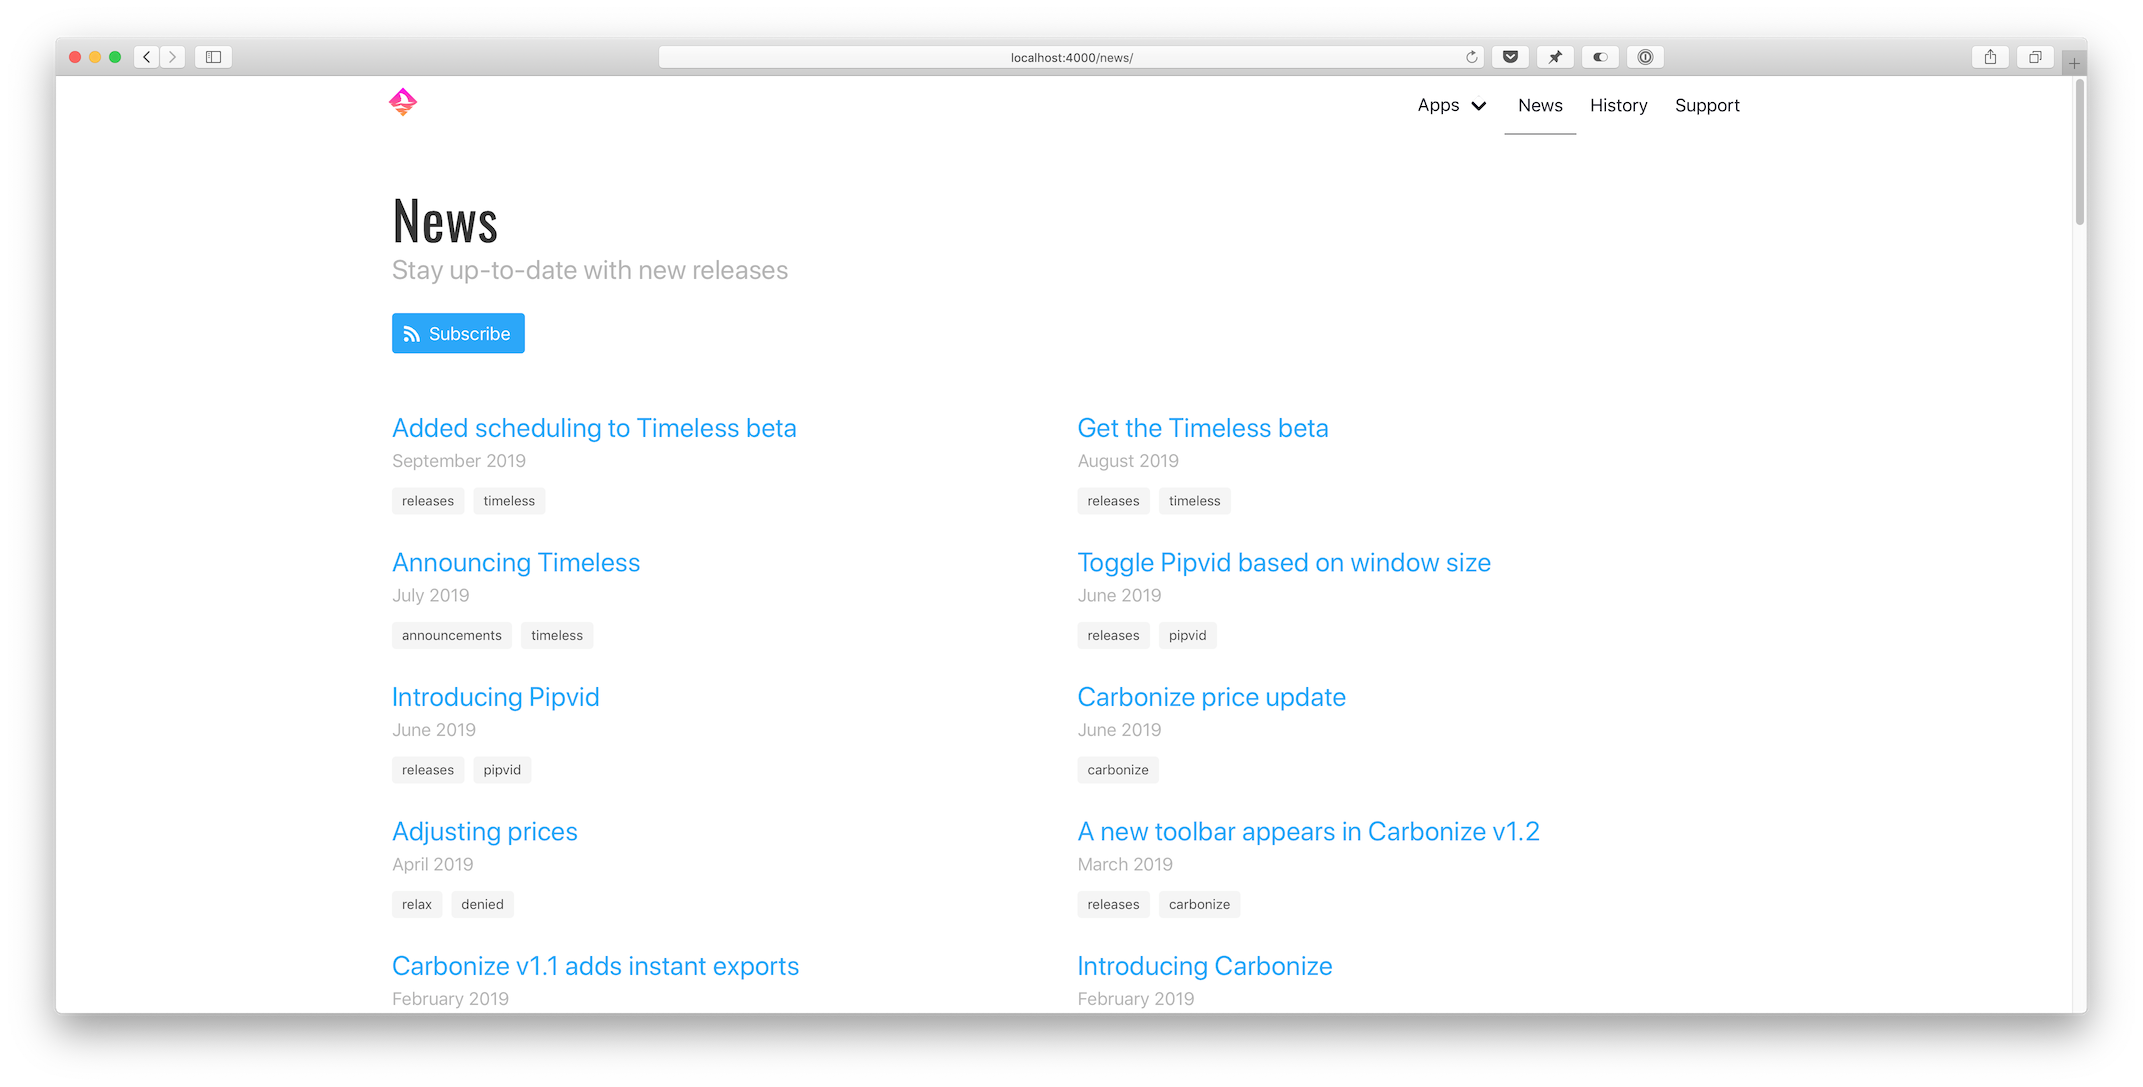
Before: A screenshot of the news overview before the changes. It showed an endless list of post titles. After: A screenshot of the news overview after the changes. It's a paginated list of full articles. Ready to read.
Pagination

Loading all posts on the /news page would be madness. The first step I took was to implement the jekyll-paginate-v2 plugin:

  1. Add gem "jekyll-paginate-v2" to Gemfile:
     group :jekyll_plugins do
       ...
       gem "jekyll-paginate-v2"
     end
    
  2. Activate the plugin in _config.yml:
     plugins:
       ...
        - jekyll-paginate-v2
          
     pagination:
       enabled: true
       sort_reverse: true # Required in my setup to order posts from new to old 
       permalink: "/page/:num/"
    
  3. Add pagination settings to the news.markdown front matter:
     ---
     ...
     pagination:
       enabled: true
       per_page: 5
     ---
    

The pagination plugin is ready to be implemented in _layouts/news/home.html at this point. It comes down to two things:

  1. Replacing {% for post in site.posts %} with {% for post in paginator.posts %} in the template.
  2. Including the paginator controls somewhere on the page.

Full post content

I updated _includes/post/preview.html to show the entire post instead of just a preview. That’s it.
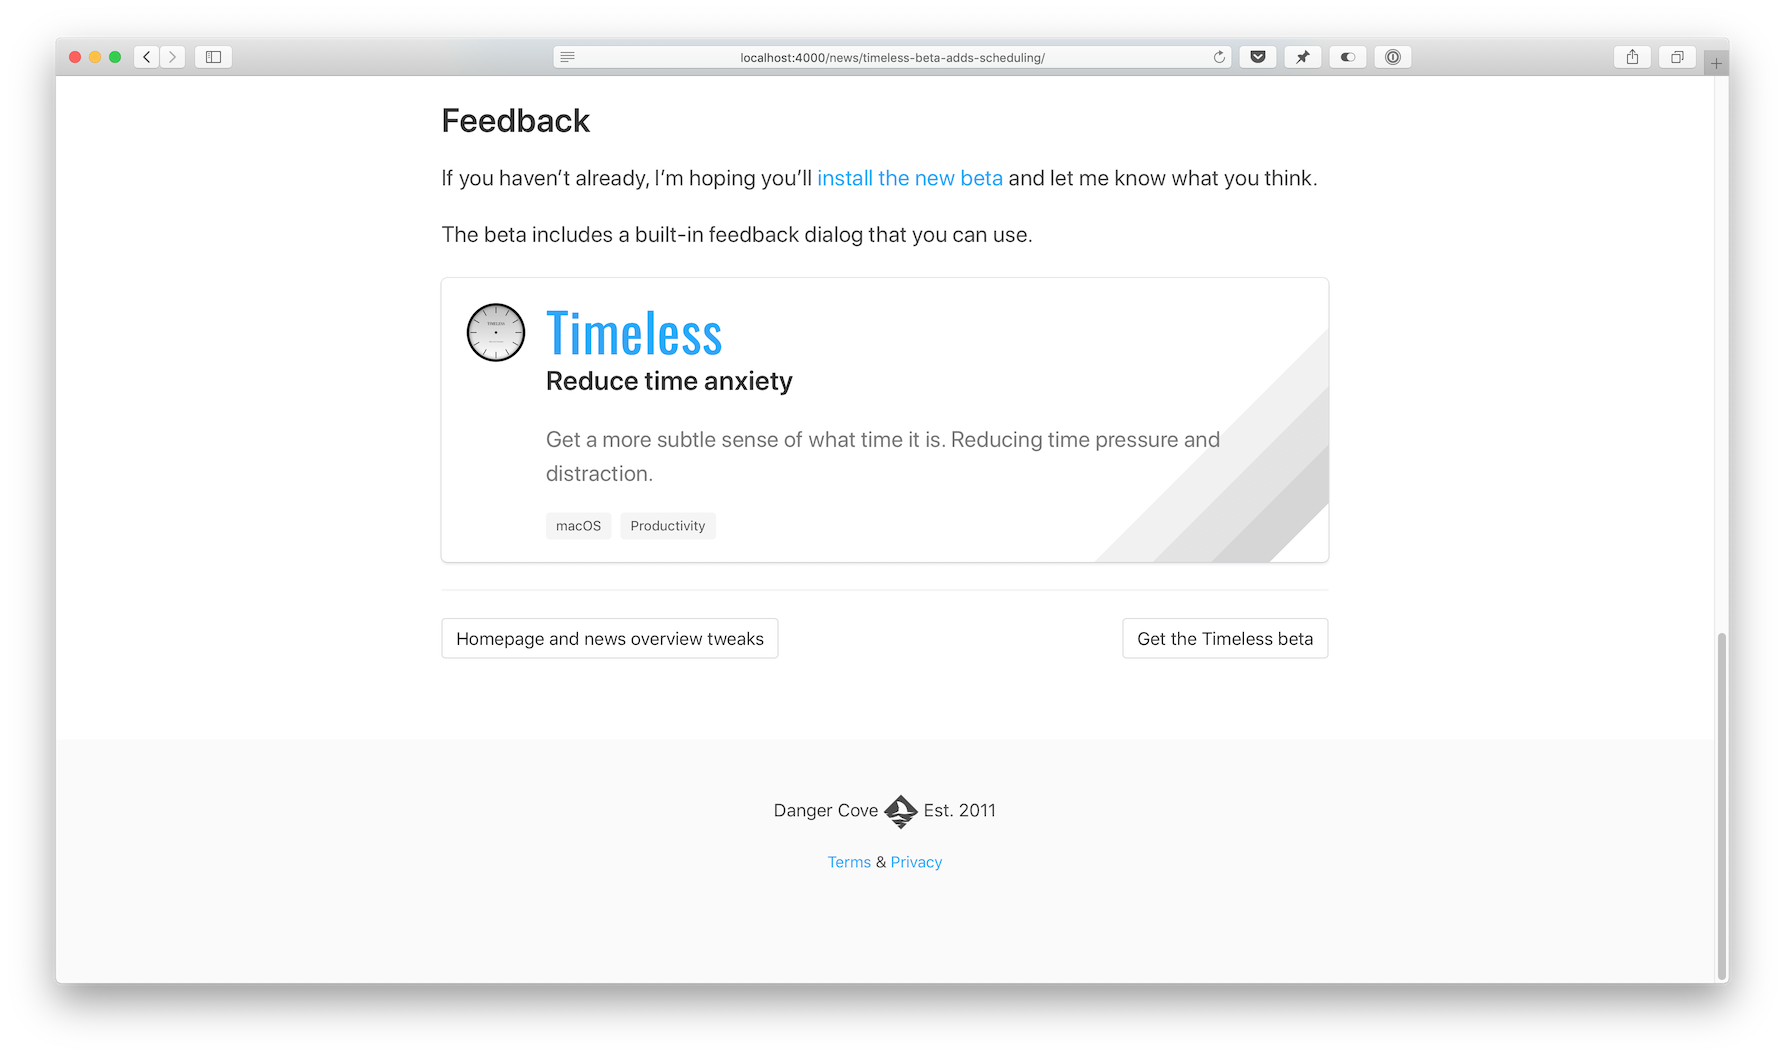
A screenshot of the Timeless 'card' shown under an article about Timeless.

This new feature uses some front matter magic to allow me to pull in related content with a blog post. Consider the _includes/post/related.html template:

{% assign tags = include.tags %}

{% for tag in tags %}
{% assign app = site.pages | where: 'topic', tag | first %}
{% if app %}
{% include app/introduction.html app=app %}
{% endif %}
{% endfor %}

Usage: {% include post/related.html tags=post.tags %}

It loops through all tags assigned to a post and then searches site.pages for a page that has a topic that matches the tag.

Imagine I write a post about Timeless and tag it like this:

---
...
tags: [updates, timeless]
...
---

If you look in the front matter for Timeless above, you’ll notice its topic:

---
...
topic: timeless
...
---

The app variable gets assigned and the app/introduction.html card template gets included. If the tags include multiple apps, each is shown.

Open-source

The full source code for this website is available on GitHub. For a comprehensive list of all changes made for this redesign, take a look at this diff: 3493aae..4518428

I hope you enjoyed this in-depth look at how I keep dangercove.com up-to-date. If you have any feedback, questions or comments let me know on Twitter.
Homepage and news overview redesigns

September 2019

I made some changes to the website that are worth sharing. In this post I’ll show you what’s different and in a follow-up I’ll go into detail about customizing my Jekyll theme.

Homepage

Before: A screenshot of the homepage before the changes. There was a large header with just the Danger Cove logo. After: A screenshot of the homepage after the changes. It shows a compact row of boxes that represent all the apps.

In the initial design the logo and tag line took up the entire screen. Scrolling was required to read about the apps. I can see what I had intended, but in practise it didn’t work well.

The new layout focusses on the software. It feels more compact and easier on the eyes. Note how the updated ‘cards’ clearly point out the app’s name and subtitle, conveying its purpose in a glance.

What do you think? Better, worse? Could it be improved? You can let me know on Twitter.

News overview

Before: A screenshot of the news overview before the changes. It showed an endless list of post titles. After: A screenshot of the news overview after the changes. It's a paginated list of full articles. Ready to read.

The news page bothered me for a while. The old template showed an endless list of post titles. I’ve written quite a few articles over the years and this mess didn’t invite anyone to read them.

In the updated situation it shows everything right on the overview. There’s no reason to not scan the first post. The results are paginated. Each page shows up to five entire stories. It’s effortless to keep reading.

A screenshot of the Timeless 'card' shown under an article about Timeless.

This is a new feature. Underneath each post it shows the apps that were mentioned. I struggled with directing readers from an article to an app. This might just solve it.

You might notice some new colors, adjusted margins and paddings as well. Nothing too radical. In the next post I’ll tell you how I implemented the major changes.